Create an Automated Welcome Email Sequence for Your Newsletter
Automated welcome emails are often the highest engagement emails you will send. Your subscribers motivation to read your content is typically highest right after opting in.
Because they get such high engagement, Welcome sequences are a great signal to inbox providers that you deserve good inbox placement — and maybe even the holy grail of email marketing, a push notification!
Single welcome email vs. welcome drip sequence
You can either put everything in one email (considering your first email will have the highest engagement), or you can spread the content over multiple emails in time-delayed sequence (to encourage habit-forming around opening your emails).
Here's a simple decision framework for choosing:
- Do you rarely send emails? Then a time-delayed sequence is best so people get used to seeing you. Otherwise its highly likely they'll sign up and immediately forget your business exists or why they signed up (which often leads to higher spam complaints).
- Do you send weekly or more frequently? Then it's best to put everything in one email, since you risk annoying your inbound leads if you're running an email sequence and weekly newsletter at the same time.
Step 1: Write your welcome emails
Head to the content tab and click New Draft (or create multiple if you're doing a sequence).
Here are some best practices:
- Remind subscribers what they'll get from you: Set expectations properly to lower spam complaints later on.
- Establish your authority: tell subscribers why they should trust you and continue opening your emails using evidence and/or social proof.
- Link to your most valuable content: if other people in your target audience engaged with that content before, chances are your newest subscribers will too.
- Encourage direct replies: now is the perfect time to ask leads and subscribers why they signed up, and what problems they're looking to solve. Replies are a strong signal to inbox algorithms that you belong in the Primary tab for that user (not promotions or updates) which has a m
- End with a call-to-action: tell subscribers what to do next. If you're optimizing for growth, this might involve asking your subscribers to share you with their network in return for a bonus. If you're trying to repair an email deliverability problem, you might ask subscribers to add you to their contacts. Etc.
Here's a good example of a high performing Welcome email:
Subject:
You're in! Our best recipes inside
Body:
Hi {name},
Welcome to BBQ Mastery. Since starting this site way back in 2013 (yikes, has it been that long already?) I've had one goal:
Help you cook the absolute highest tier BBQ for your friends and family.
Whether you're a beginner or have been BBQing for years, you've come to the right place.
Over the past 20+ years of serving as pitmaster at renowned restaurants across Texas, I've trained with the best, and encountered every damn problem you will run across.
All of my findings are coming to you soon — expect a new tip or guide from me every week.
Until then, here's some of my most popular recipes:
[Insert links to highest performing content]
If you'd like to follow along on my adventures traveling the US and cooking with the best Chefs I know, head over to my [Instagram] and [X] where I post every day. Or, if you're into video, check out my [Youtube].
P.S. - Yes, this is an automated email...but I read every response religiously. Hit reply and tell me why you subscribed and what you're hoping to see next!
Step 2: Create the automation & trigger
Now that you've written your draft/s/, head to the Automations tab using the sidebar and click Create New.
Every automation starts with a Trigger. If you're just starting out, it's usually easiest to select "User subscribes via any source" as the trigger.
However, if you're doing segmentation or running multiple audiences, you can set the trigger based on a subscriber entering an audience filter based on certain criteria (eg. like a tag being added or custom field data changing).
Step 3: Build your sequence and activate it!
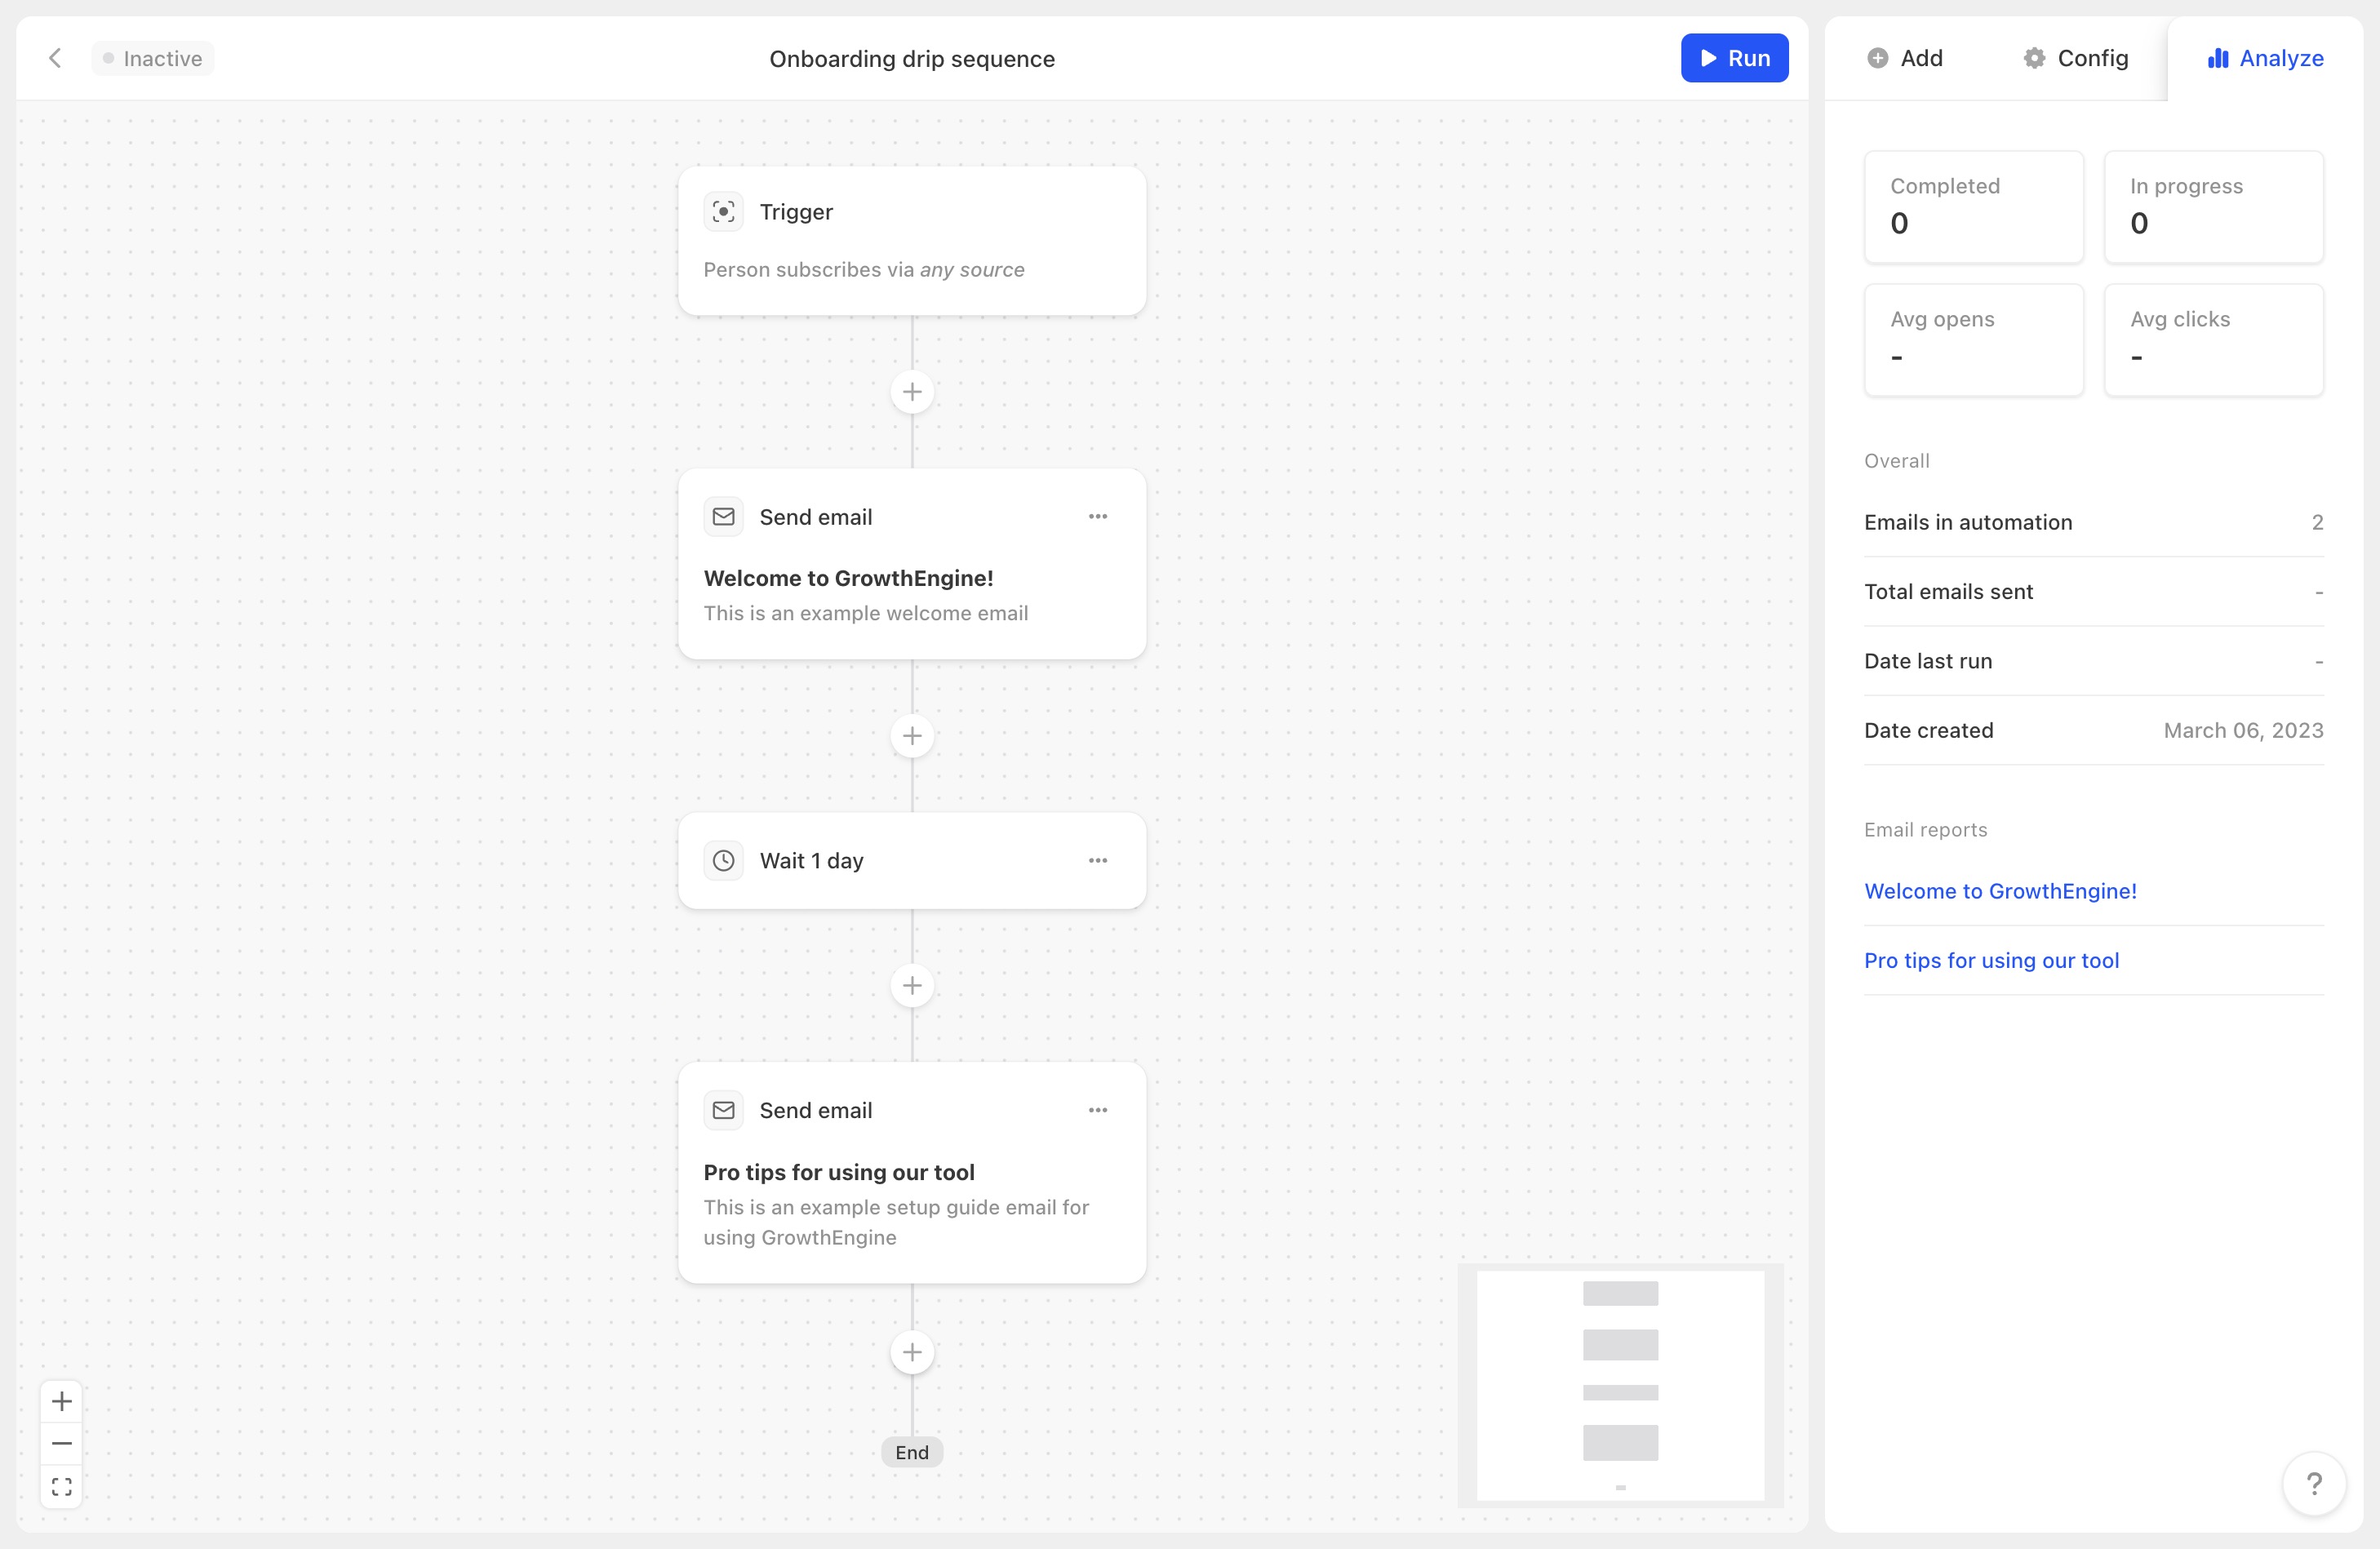
A welcome email example
By clicking the plus icons, you can choose to add email sends and time delays in whatever order you wish.
When you're ready, make sure you've selected the right email theme for your automation, and click the Run button.
You're done!
Pro tip: If you're targeting B2B, disable emails on weekends
In each Automation, you can specify what days automated emails should be sent on. Click the config menu in the top right of any automation to edit this.
By default, all 7 days of the week are checked. However, if you uncheck Saturday and Sunday and click Save, Audienceful will pause your sequence on weekends, so you only send emails on weekdays.