Email signup forms in Webflow
This is a simplified guide for adding a single field email signup to a Webflow site. If you want to collect more than just email addresses, follow this advanced guide for custom fields in Webflow forms.
Copy your unique signup URL
Go to the Settings tab. You'll see a section titled Signup forms. Here you'll find a POST url. This allows Webflow forms to send data to Audienceful.
If you'd like to add tags to new subscribers automatically, you can enter them here, and a new POST url will be generated.
Create a form in Webflow
Head to your Webflow site, and create a form. If you need help creating forms, follow this Webflow guide.
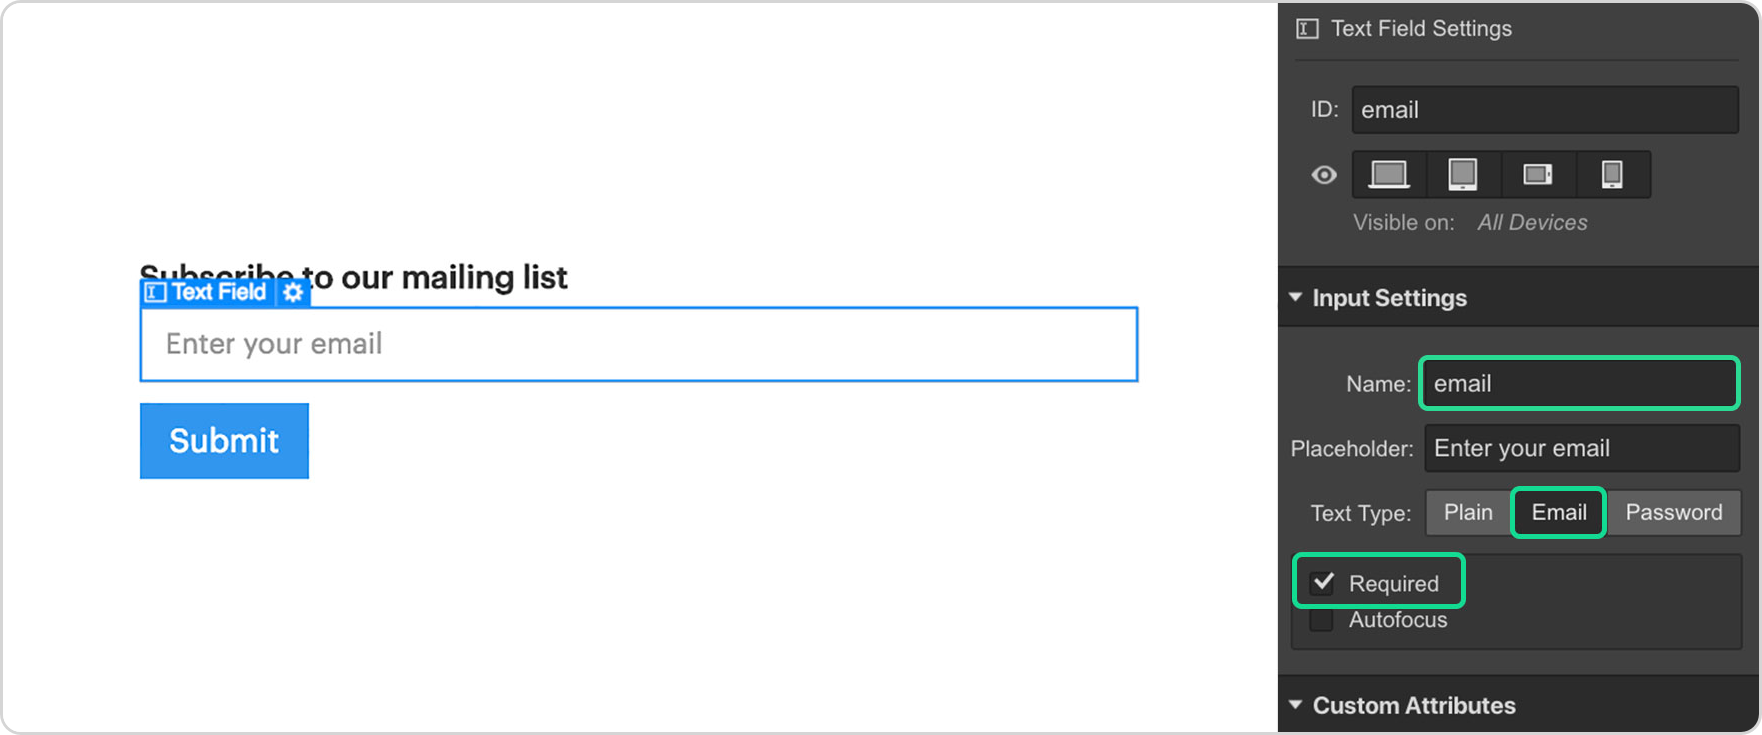
Once created, select the text field specifically, and ensure it has the following settings:
- Name: email
- Text type: Email
- Required? Yes
Make your form send data to Audienceful
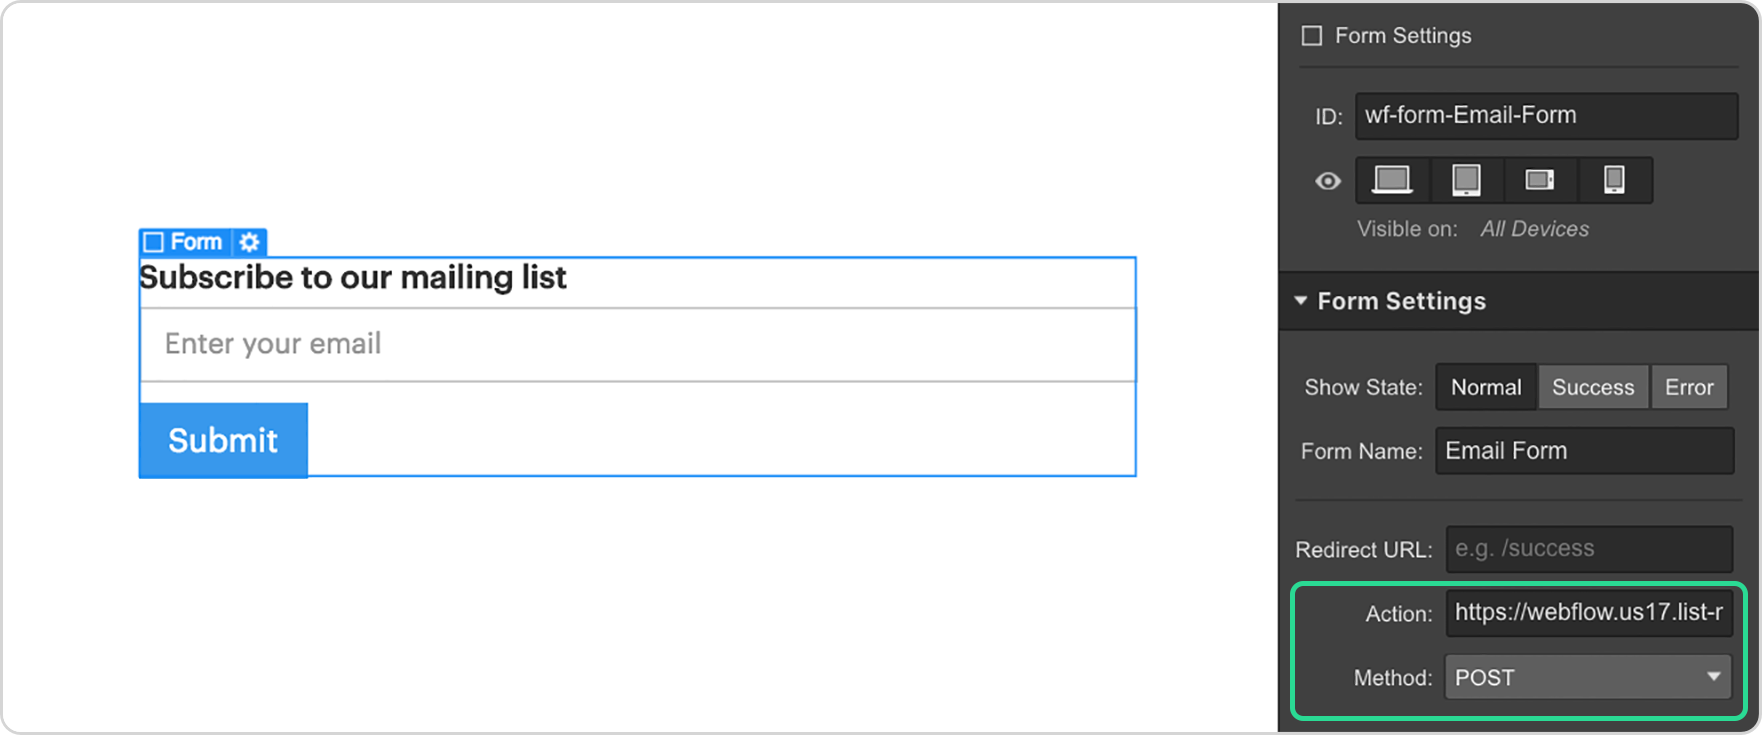
Now select the entire form, and give it the following settings:
- Action: [Paste URL from step 1]
- Method: POST
If you don't want to create a custom success page, you're done! Audienceful will provide a success page for you. However, you probably should create one. Here's why:
Add your success page in Audienceful
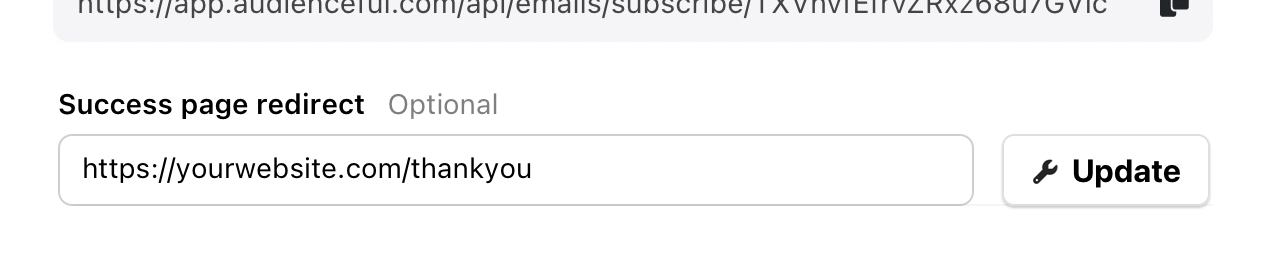
We recommend directing signups to a custom 'success' or 'thank you' page on your website (and not just showing a message in-page).
The reason is simple; a page redirect is easily tracked by your analytics tool.
So by looking at the analytics for yoursite.com/thankyou, you will now see data specifically about your email subscribers (their demographics, what page they signed up from, etc), segmented from other visitors. This can be quite powerful.
For info on how to setup email conversion tracking in Google analytics, check out this guide. It's also very easy to do in privacy friendly analytics tools like Fathom and Plausible.
Add a spam honeypot to your Webflow form
To prevent bots submitting fake email addresses into your forms, we HIGHLY recommend adding a hidden honeypot field. Since it's invisible to real visitors, Audienceful will block any signup where data was added to the honeypot field.
To implement, simply create an HTML embed element inside your form, and paste the following code:
<div style="position: absolute; left: -5000px;" aria-hidden="true">
  <input type="text" name="b28-ft" tabindex="-1" value="">
</div>
Re-publish your Webflow site and submit a test signup to confirm everything's working. As long as a real address lands in your People tab (and gibberish in the honeypot gets blocked), you're all set.
If you'd like to collect more than just an email address (like a first name, company, or a marketing opt-in checkbox), follow our guide for custom fields in Webflow forms. And if you'd rather skip the redirect and show Webflow's native inline success message instead, see showing an inline success message with no redirect.