Custom fields in Webflow forms
Note: If you only want to collect email addresses on your signup forms, you can follow this simplified guide: collecting email sign ups.
In this tutorial, we'll go over how you can collect as much data about your subscribers as you'd like using complex forms. Let's begin.
1. Ensure custom fields are set up in Audienceful
If you want to collect more than just email addresses, you first need to create fields in Audienceful for your data. If you haven't done this before, learn how here: Adding custom fields
For this tutorial, we created the following custom fields:
- First name (text)
- Job title (text)
- Opt-in to promotional emails? (boolean)
2. Head to Webflow and create the form
Once you've added your custom fields to the People tab, you can now create the form on your Webflow site. If you don't know how to create forms in Webflow, follow this guide. Here's what ours looked like:

3. Name the Webflow fields to match Audienceful's
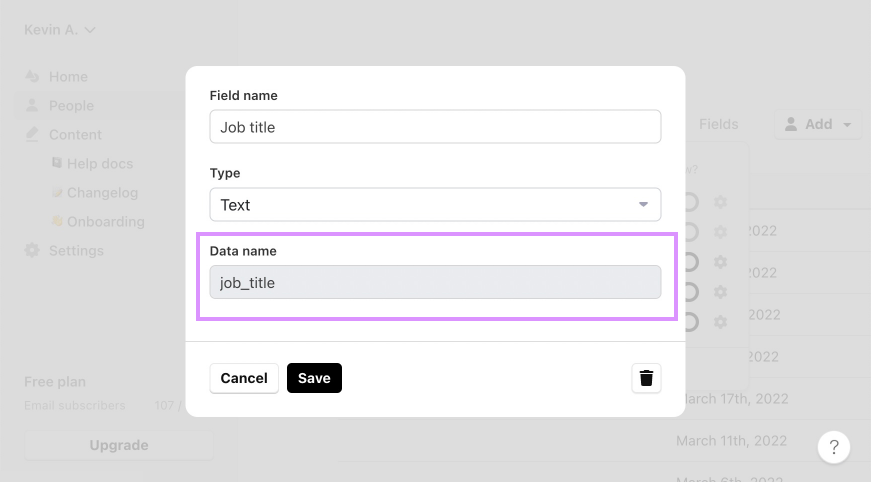
When you create fields in Audienceful, a "data name" is generated for each one based on the name you chose. You need to title your Webflow fields to match.
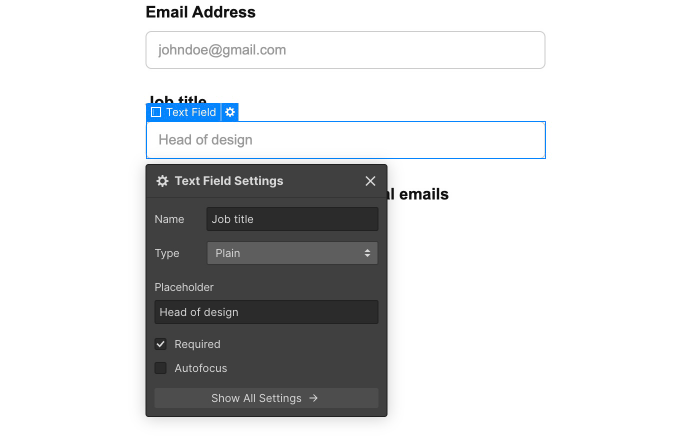
Data names are all lowercase, have no special characters, and have underscores instead of spaces. Here's an example of what the Job Title field looks like in Audienceful and in Webflow:
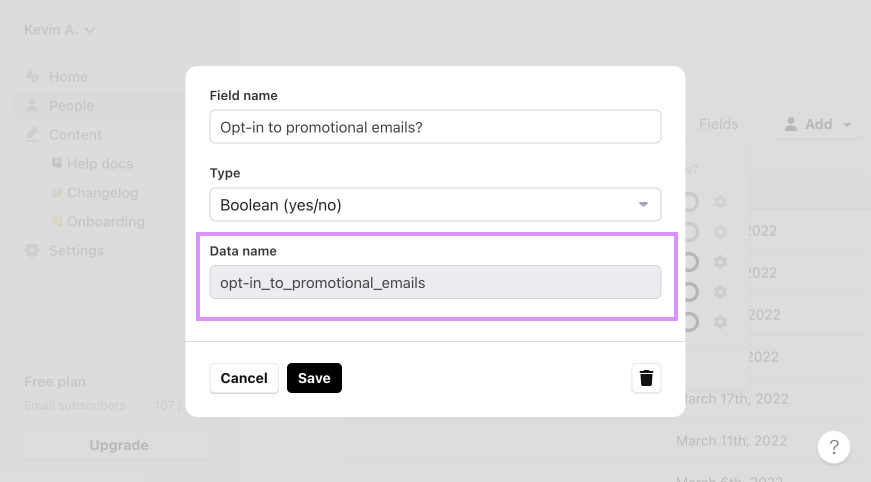
Here's an example of the "Opt-in..." checkbox field in both Audienceful and Webflow:

Do this for all of your custom fields (the email field can just be named "email").
NOTE: if you rename any of your custom fields in Audienceful, the data name will change. This means you will need to go back to your Webflow site and adjust the field names to match again.
4. Set the form to post data to Audienceful
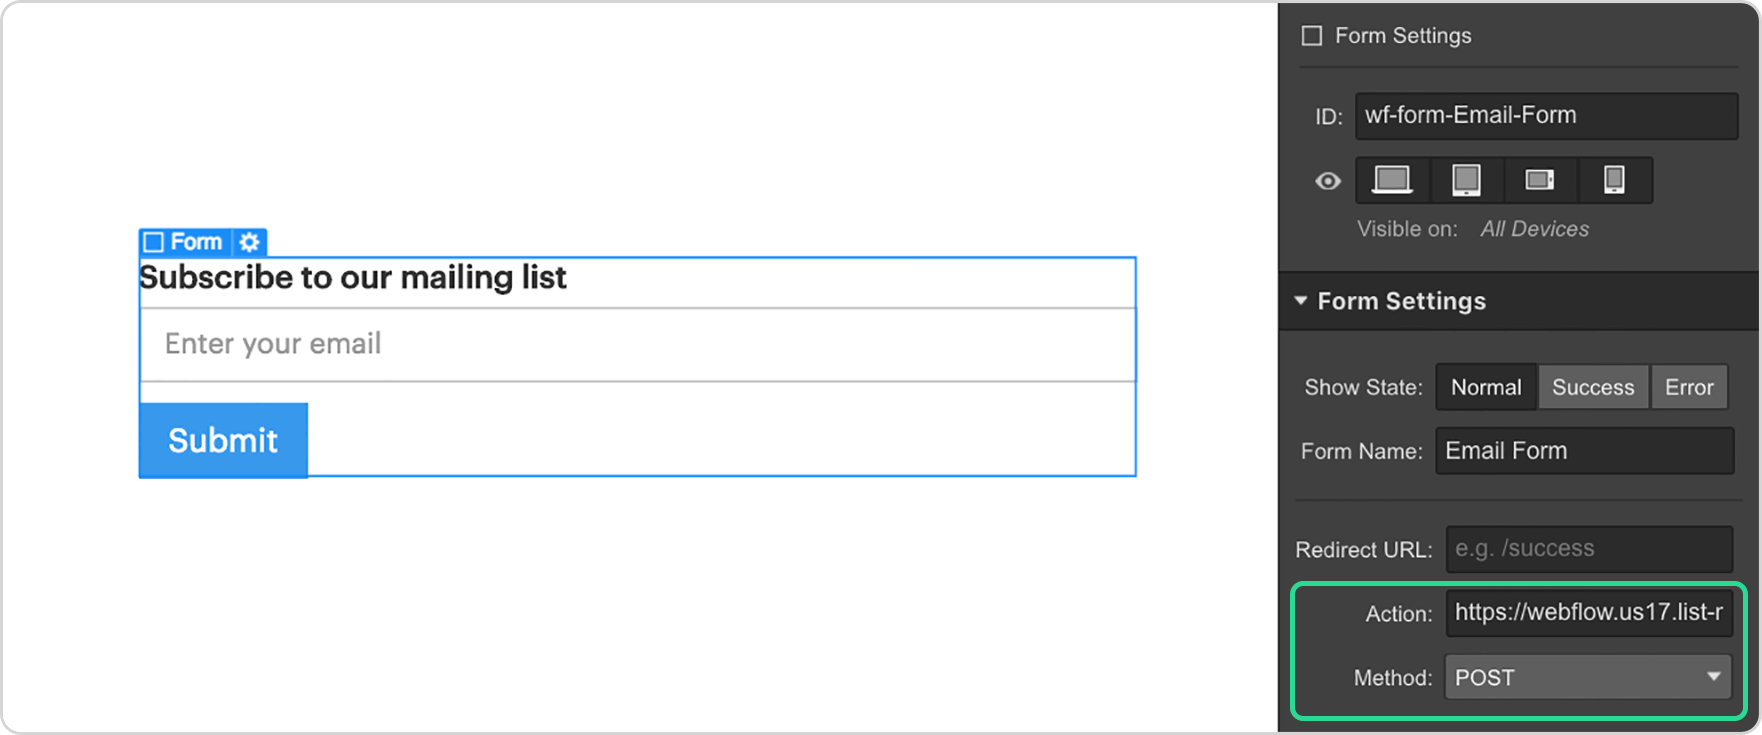
- Action: [Paste your signup URL from Audienceful's settings]
- Method: POST
Test your form to make sure it works. If you don't want to add a custom success page, you're done!
However, we recommend you do so for analytics purposes. This way you can track conversions by seeing who visits yoursite.com/thankyou.
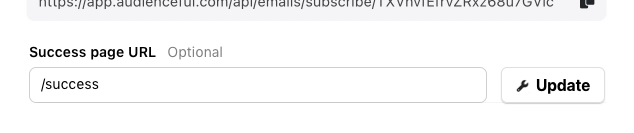
5. Set a custom success page in Audienceful
To set your success page, head to Settings > Signup forms, select the form you're using and update it with your success page URL.
[Optional] Add a spam honeypot to Webflow
To prevent bots submitting fake email addresses into your forms, we recommend adding a hidden honeypot field. Since it's invisible to real visitors, Audienceful will block any signup where data was added to the honeypot field.
To implement, simply create an HTML embed element inside your form, and paste the following code:
<div style="position: absolute; left: -5000px;" aria-hidden="true">
  <input type="text" name="b28-ft" tabindex="-1" value="">
</div>