How to Send Transactional Emails
Transactional emails are one-off messages you send to a single person in response to something they did: a receipt after a purchase, a welcome after a signup, a password-reset link, an order confirmation. Instead of scheduling a campaign to your whole list, you design the email once as a draft and trigger it from your own app or backend through the Audienceful API whenever the moment calls for it.
Every send renders a draft you've already built, so the email is fully designed and personalized, with no plain-text-only receipts. This guide walks through sending one end to end.
Before you start
You'll need three things:
- A draft to send. Any email in your Content can be sent transactionally. Build it the same way you'd build a campaign.
- An API key with the
emails:sendscope. Generate one under Settings → API. See Authentication for the details.
Step 1: Build the email you want to send
Create or open the draft you'd like to send and design it as usual. To personalize each send, use:
- Merge tags for values stored on the contact (like their first name).
- Event properties for one-off values you'll pass in at send time (like an order number or a reset link).
Give the draft a title. Its title becomes a readable slug (for example, "Order receipt" becomes order-receipt) that you'll use to reference it in the API. The slug is stable: renaming the draft later won't change it.
Step 2: Open the "Send transactionally" panel
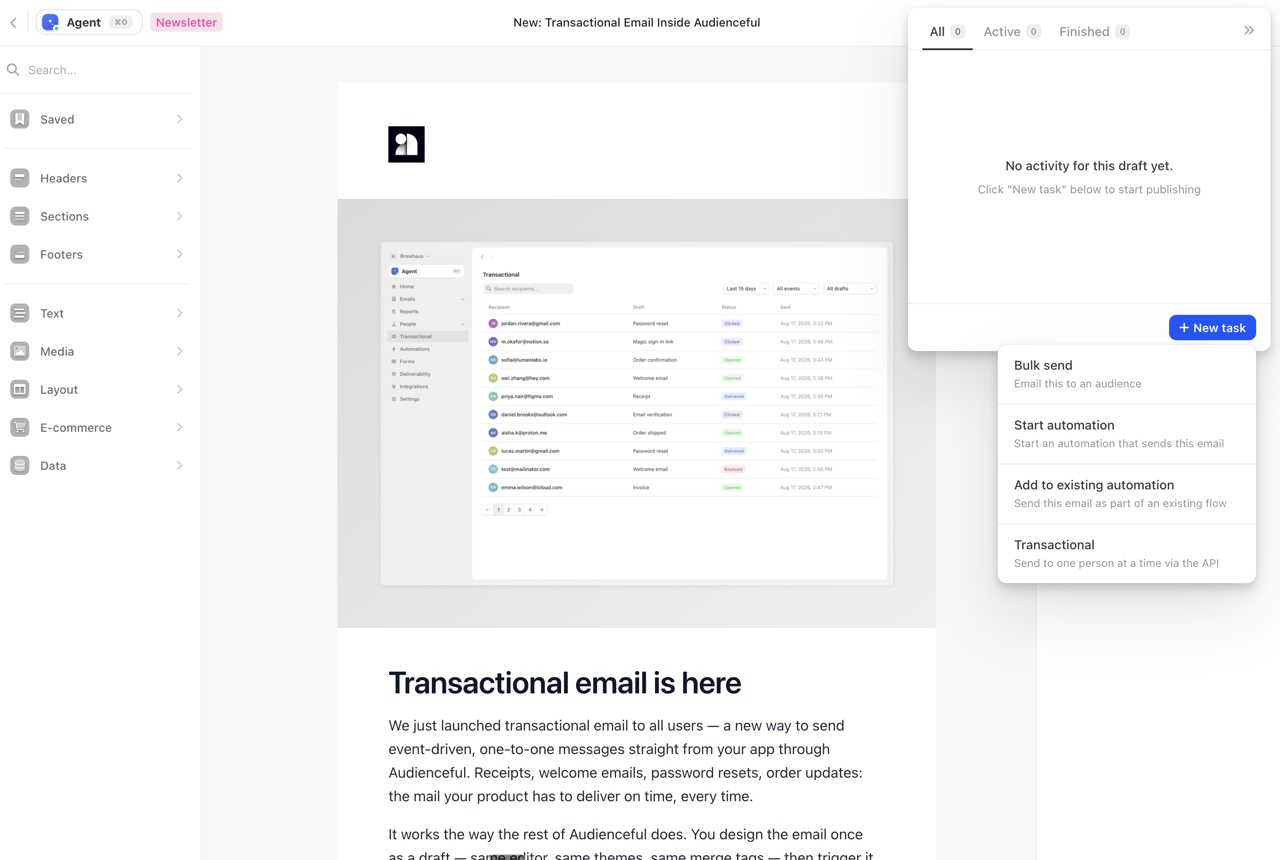
From your draft, click Publish and choose Transactional. This opens a panel that describes exactly how to send this specific email through the API.
The panel gives you everything you need for this draft, ready to copy:
- Endpoint: where the request goes:
POST https://api.audienceful.com/v2/transactional - Request body: a JSON payload pre-filled with this draft's handle.
- Example: a ready-to-run
curlcommand.
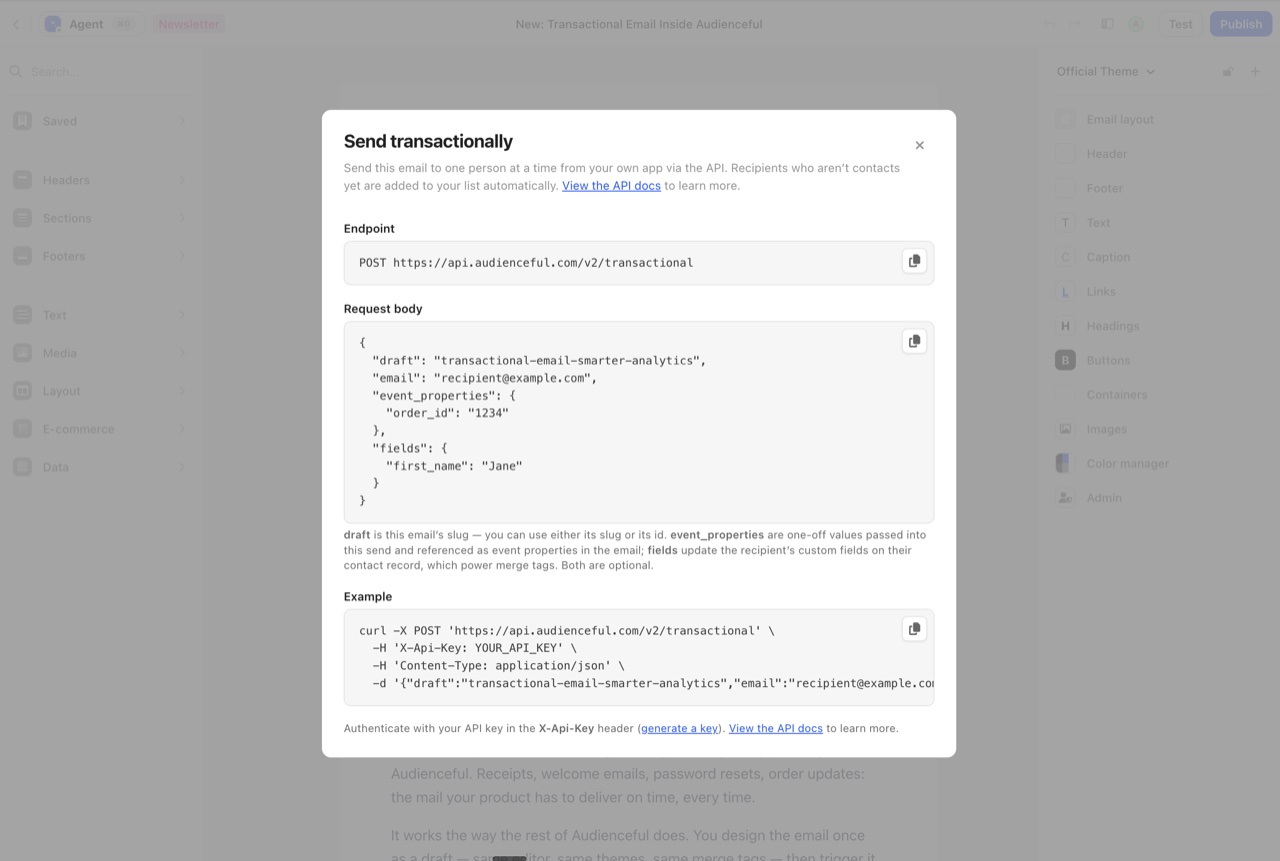
The request body looks like this:
{
  "draft": "order-receipt",
  "email": "recipient@example.com",
  "event_properties": {
    "order_id": "1234"
  },
  "fields": {
    "first_name": "Jane"
  }
}
draftis this email's slug (or id); either one resolves to the same draft.emailis the person you're sending to.event_propertiesare one-off values passed into this send and referenced as event properties in the email. (Optional.)fieldsupdate the recipient's custom fields on their contact record, which power merge tags. (Optional.)
Step 3: Trigger the send from your app
The panel doesn't send the email itself. Sending happens when you call the endpoint with your own API key, from your backend, a script, or a tool like a Zapier/Make webhook. Copy the example, add your API key in the X-Api-Key header, and fire the request:
curl -X POST 'https://api.audienceful.com/v2/transactional' \
  -H 'X-Api-Key: YOUR_API_KEY' \
  -H 'Content-Type: application/json' \
  -d '{
    "draft": "order-receipt",
    "email": "recipient@example.com",
    "event_properties": { "order_id": "1234" },
    "fields": { "first_name": "Jane" }
  }'
That's the actual trigger. For the full list of fields, headers, responses, and error cases, see the Send a Transactional Email API reference. New to the API? The Quickstart gets you to your first authenticated request in a couple of minutes.
Add an Idempotency-Key header so a retried request never double-sends. A repeat of the same key returns the original response instead of sending again.
Step 4: Track the send
The API accepts your request and sends the email in the background, so the response comes back immediately with a 202 Accepted and an operation you can watch:
{
  "id": "tXn3nKq8Zs4pLm9vRb2xJc",
  "operation_id": "task-abc123",
  "operation_url": "https://api.audienceful.com/v2/operations/task-abc123",
  "status": "pending",
  "draft": "order-receipt",
  "email": "recipient@example.com"
}
- Poll the operation at its
operation_urlto watch the send move frompendingtosent(orfailed). See Retrieve an Operation. - Check the log. Every transactional send is recorded on your Transactional page, and opens, clicks, and bounces show up in the recipient's contact activity.
Transactional sends are kept separate from campaigns, so they won't clutter your regular send reports.
Good to know
- Recipients are added to your list by default. If the email address isn't already a contact, it's added as an active subscriber so the send always has somewhere to go. To send without adding them, pass
"add_contact": falsein the request body (see the API reference). - Unsubscribed contacts still receive transactional email. A receipt or password reset is a direct reply to the recipient's own action, not marketing. However, an address that has previously hard-bounced or been cleaned is skipped rather than emailed again.
- Monthly limits. The Free plan includes 100 transactional sends per month; paid plans are unlimited.
Troubleshooting
403"not verified for sending": add a payment method to your workspace, or resolve a failed payment.403 transactional_quota_exceeded: you've used this month's Free-plan allowance. Upgrade for unlimited sends, or wait for the reset at the start of next month.404on the draft: thedraftslug or id doesn't match a draft in your workspace. Double-check the handle shown in the "Send transactionally" panel.401/403on auth: your API key is missing, invalid, or doesn't have theemails:sendscope. Generate or re-scope a key under Settings → API.
Still stuck? Get in touch and we'll help you get your first transactional email out the door.